Wednesday 27 March 2019

STAMPIN'UP! STORAGE IS COMING


How awesome is this announcement by Stampin'Up!.  New storage systems for the new style ink pads and markers, blends markers and a cube that you can store anything you like in.  All this coming on 1st April.

Contact me today to find out how you can order yours.

Tuesday 26 March 2019

EASTER CARDS


Today I am sharing some Easter cards I have created for a special order.

My first two cards are the traditional Easter Bunny cards using the very cute Best Bunny Stamp Set.  The bunny and the eggs I have coloured with the Blends Markers.


On this card I stamped the Hopping By sentiment directly onto the card and then had my bunny ears cover up the word "Hi".  I then stamped a separate Happy Easter sentiment which I added to the card.


As I don't really have too many Easter Stamp Sets in my collection you will also see that I have used a couple of retired stamp sets also to compliment these cards.

My next card is a simple floral Easter themed card using the Petal Palette Stamp Set and the Stitched Rectangles.


My final two cards needed to have a religious theme and as I didn't have any religious Easter stamp sets at all I decided to create my own version of a cross using one of the dies from the Petals & More Thinlets Dies.


Again, I have used a few retired stamp sets and punches etc to complete my cards.

Some of the products I used to the create these cards are here:


Petal Palette Clear-Mount Bundle
[145974]
$108.00

Wednesday 20 March 2019

BEAUTIFUL BUTTERFLY BIRTHDAY CARD


Today's card is one I have created as a special order.  Another fancy fold card using the Butterfly Beauty Thinlets Dies.


I absolutely love the way you can layer these dies to give the two tone colours.  The first layer was cut from Blushing Bride and the second layer from Gorgeous Grape.


The small butterfly was actually attached to the bottom of the large die, however, I cut it off as it was a little too big for the card, and attached to the inside of the card.

The DSP used is the FREE Sale-a-Bration beautiful Botanical Butterfly papers.  I will be sad when these papers retire.  The sentiment is from the Best Bunny Stamp Set.

The supplies I used for this card are here:

Product List

Friday 15 March 2019

NEW PRODUCT PLAYTIME


I just got an order in and was excited to be able to create with the Painted Seasons Designer Series Paper which I was able to choose as my FREE gift during Sale-a-Bration.  Yes, that is right, even as demonstrators we get to receive FREE products when we place our own qualifying orders.

This paper is just so gorgeous.  The colours are just so pretty.


I also received the Dear Doily Bundle.  Oh my goodness, the stamp set is just divine and there are so many ways to use the Doily Builder Thinlits Dies.  I think I must have spent at least an hour trying out all sorts of combinations with these dies. 

I really wish I had decided to purchase these earlier, as I believe that they won't be carrying over and are also low on stock here in Australia.  So if you are thinking of getting this bundle, please do so as soon as possible.


These are the 3 cards I managed to create in the short time I had to play.  All these cards have used the paper as a base to build on.  Love them all.   Which one is your favourite?

Don't forget that Sale-a-Bration only has another couple of weeks to go, so if you would like to receive this paper as a FREE gift then just place an order for a minimum of $90 (excluding shipping and handling) and you can choose this product for FREE.

Supplies used:

Painted Seasons Designer Series Paper
$0.00
Dear Doily Cling Bundle
$89.00
Pool Party A4 Card Stock
$14.75
Pool Party Classic Stampin' Pad
$13.00
Lemon Lime Twist Classic Stampin' Pad
$13.00
Stitched Shapes Framelits Dies
$50.00
Layering Circle Framelits Dies
$58.00
Twine Baker's Whisper White
$5.25
Clear Wink Of Stella Glitter Brush
$11.50
Call Me Clover A4 Cardstock
$14.75
Whisper White A4 Card Stock
$17.00
Tuxedo Black Memento Ink Pad
$10.00
Happiness Blooms Enamel Dots
$12.25
Very Vanilla A4 Card Stock
$17.00
Real Red A4 Card Stock
$14.75
Early Espresso Classic Stampin' Pad
$13.00
2" Circle Punch
$31.00
Old Olive 1/8" Sheer Ribbon
$10.50

Thursday 14 March 2019

HAPPINESS BLOOMS MEMORIES & MORE CARDS

Sharing some simple cards today created with the Happiness Blooms Memories & More Cards.

All these cards have simply used one or more of the cards from the pack and had some little embellishment with ribbon etc.


You can also purchase the Happiness Blooms Memories & More Cards & Envelopes which make creating your cards even easier, although I just created a few different coloured base cards for my projects.


There are some stunning designs included in this set of cards and for just $17.50 you receive a total of 50 double-sided cards (2 each of 25 designs).


So not only can you use your Memories & More card packs to create wonderful scrapbook memories, but also cards and other projects as well.

The Happiness Blooms Memories & More card pack is on page 26 of the Occasions Catalogue and as a bonus also co-ordinates with the Happiness Blooms Suite on page 25 of the Occasions Catalogue.

Don't forget to check out the other Memories & More card packs available on pages 195 and 196 of the Annual Catalogue.

Here is a list of the supplies I used for these cards.


Happiness Blooms Memories & More Card Pack
$17.50
Happiness Blooms Memories & More Cards & Envelopes
$14.75
Whisper White A4 Card Stock
$17.00
Night Of Navy A4 Card Stock
$14.75
Organdy Ribbon Combo Pack
$0.00

Tuesday 12 March 2019

KYLIE'S DEMONSTRATOR TRAINING BLOG HOP - MARCH 2019


Hi and thank you for joining me in my first blog hop with Kylie's Demonstrator Training Group for March 2019.  I am so thrilled to be hopping together and inspiring you with all the gorgeous Stampin'Up! products available.

We are a group of Stampin'Up! Demonstrators from all around the world that want to learn more to progress in our business.  Blogging helps us to learn and connect with people, inspiring creativity, which is one of the reasons I love Stampin'Up!.

I would love it if you would leave a comment on my page and also to check out all the other wonderful projects created for this hop.

Here is my card.


This is the view of the card when it is opened and folded out flat.  Below is the card when it is all folded up ready to give to that special someone.


I created this card using one of my favourite stamp sets at the moment from the 2019 Occasions Catalogue - The Forever Lovely Bundle - just beautiful stamps and co-ordinating dies.  I find this a very deceptive set because to look at it in the catalogue does not do justice to the beautiful projects you can create.


Above is a  view of the card with just the inside peeking out when you slip off the belly band keeping it together.

I know the outside of the card is very unremarkable, but once you open the card and dig deeper there is so much more to see.


Here is a view of the card completely opened out and with the easel card standing in the middle.  See, I told you there was more to this card than meets the eye.


So for some more details on how to create this card:

The card base is Blackberry Bliss and has been cut at 8" x 6" and scored at 2" on each side.  The Whisper White pieces have been cut at 5 3/4" x 1 3/4" and embossed with the Petal Pair Embossing Folder and then adhered to the fronts of the card.


Inside the card, pieces of Whisper White cardstock have been die cut with the Lovely Flowers Edgelits Dies and adhered to the sides.


Inside the middle of the card  have adhered a piece of Sahara Sand cardstock (5 3/4" x 3 3/4").  I have die cut another piece of Blackberry Bliss cardstock with the Lovely Flowers Edgelits Dies and adhered this piece to the bottom of the Sahara Sand piece (this piece is approximately 2" high).  A strip of Blackberry Bliss cardstock (3/4" x 3 3/4") has had some Whisper White Ribbon adhered to the middle and then adhered to the base with dimensionals.


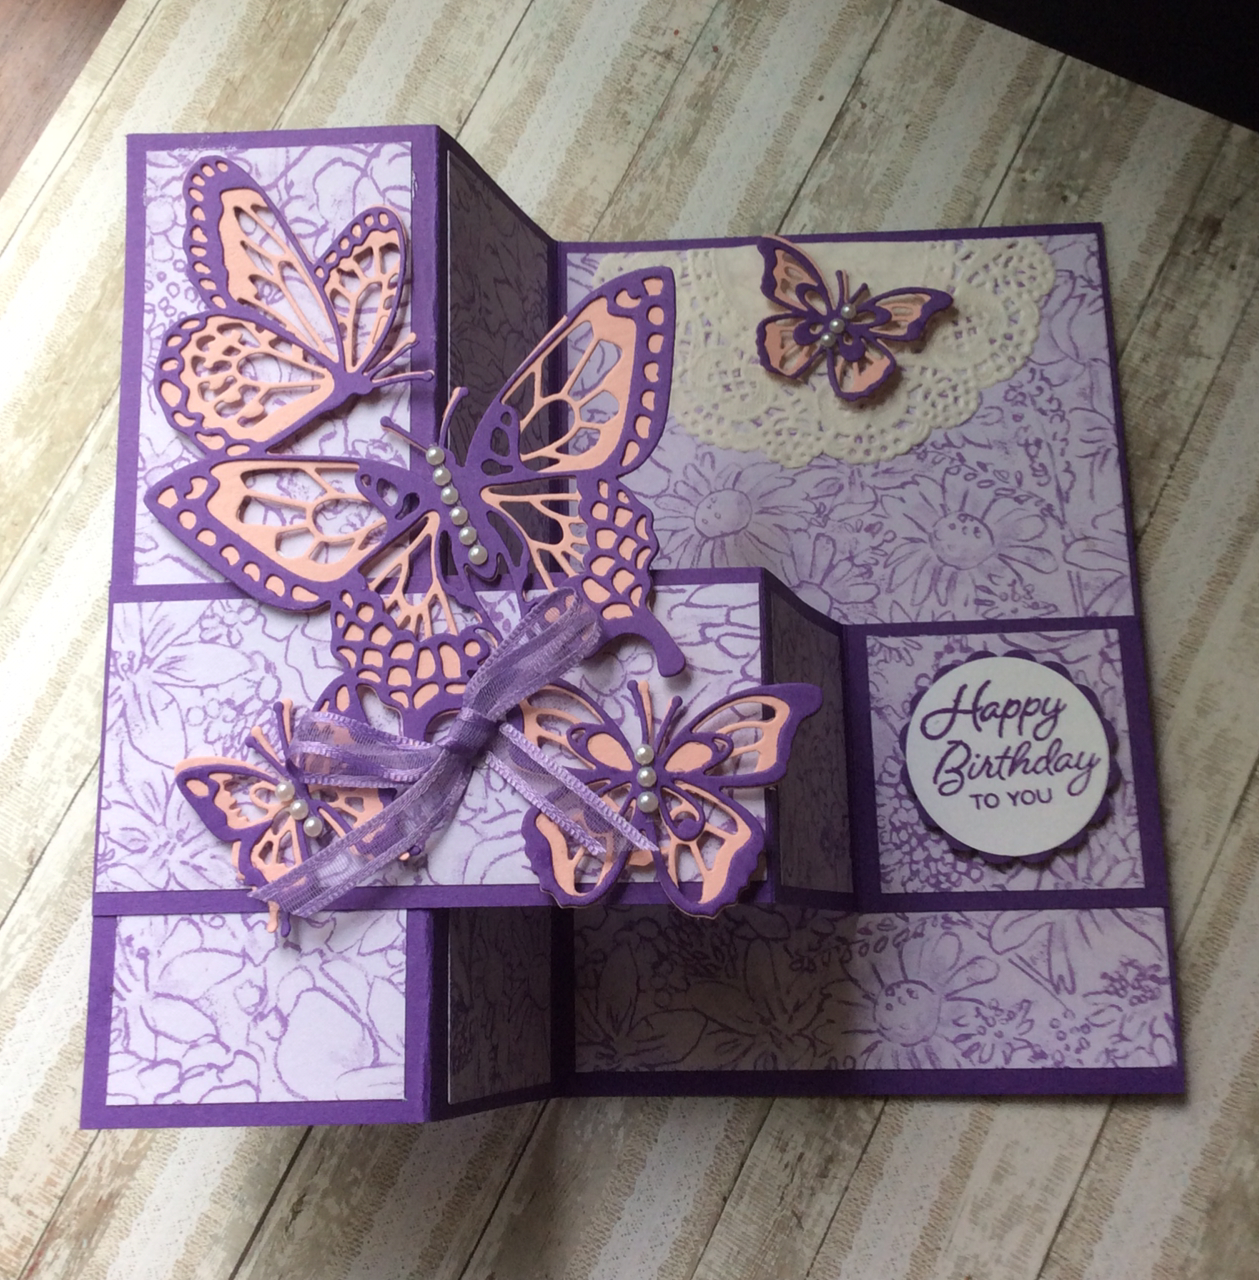
To create the Easel Section of the Card I have cut a Blackerry Bliss piece of cardstock 6" x 3 3/4" and scored at 1/2" and 3 3/8".  This piece has then been adhered to the top of the card approximately 1/2" down from the top. (As I was experimenting with sizing etc this is how I did it, but I'm sure you could really just cut another piece of cardstock the same size as your base cardstock, score and adhere right at the top of the base cardstock - this is what I will do next time).


Prepare your front piece by using your Stamparatus to stamp the top and bottom of a Whisper White piece of cardstock (5 1/2" x 3 1/4") - flowers in Blackberry Bliss and leaves in Granny Apple Green.  Adhere a piece of Vellum to the middle (3" x 3 1/4").


Adhere a flower and leaves etc cut from the Delightfully Detailed Laser Cut Specialty Paper over the vellum.

Stamp and die cut flowers and leaves from the Forever Lovely Stamp Set - Blackberry Bliss Ink  for the flowers and Granny Apple Green Ink for the leaves.  Add some pearls (these were in my retired stash of goodies) to the centres of the flowers and adhere over the top of the Laser Cut Flower Paper with dimensionals for the flowers and glue for the leaves.

Adhere the stamped piece to a piece of Sahara Sand cardstock (3 1/2" x 5 3/4") and tie some Fresh Fig ribbon around the bottom of where the vellum finishes.  I wrapped the ribbon around and affixed to the back and then took another piece of ribbon and made a double bow which I then affixed to the card with glue dots.

Adhere this entire piece to a piece of Blackberry Bliss cardstock (6" x 3 3/4") and then adhere this piece to the bottom of your easel piece.

To complete the card I simply created a belly band approximately 2 1/2" wide.  Stamped the sentiment on Whisper White in Blackberry Bliss Ink and then die cut with a circle.  Die cut a larger circle in Sahara Sand and a larger again Scalloped Circle from Blackberry Bliss.  Adhere all together to create the belly band.

I had so much fun creating this card.  I did base it on a previous card I had created in softer colours and then stepped it up further with the extra special fancy fold.  This card is actually going to be given to a very special person for their birthday, so I hope they really like it as much as I enjoyed creating it.

Thanks for visiting today.  I hope you enjoyed my card.  Don't forget to visit each of the blogs listed below to get some creative ideas from these very amazing crafters.   


Finally the list of supplies I used for this project:


Stamparatus
Glue Dots
$8.00
Related Posts Plugin for WordPress, Blogger...